
This small-batch honey whole wheat challah is a cinch to make, and tastes just as fluffy and delicious as white challah! Try it once and you’ll never make white challah again. Special thanks to my wonderful sister in law for this recipe!
For those of you who don’t know, challah is the traditional bread Jews eat on the Sabbath. It is soft, fluffy, and rich, and is generally braided with either 3, 4, or 6 strands.
As I mentioned in my introduction, this challah is whole wheat, but doesn’t taste whole wheat. My husband, who usually hates “brown bread,” tasted a piece of this and declared, “it tastes white!”
Disclosure: Product links may be affiliate, which means I get a commission if you click through and purchase. This does not affect the price of your item.
What’s the secret that makes this challah not taste heavy, like most whole wheat breads do?
Well, there’s no major secret, really. Here are some pointers that help it to rise and become nice and fluffy:
- Don’t use too much flour. Add just enough flour to make a sticky dough, and then mix it with a spoon or spatula instead of kneading it with your hands.
- Let it rise completely. Let the dough rise till it’s doubled in size, shape your challahs, and then let them rise again before baking.
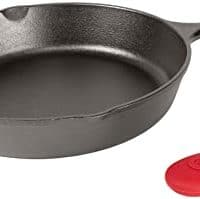
- If you have one, let the dough rise in a cast iron skillet. This is my new favorite way to let bread dough rise, and it works a treat.
As you start making the dough, stick your cast iron pan on top of a burner, turn it on high heat, then turn it off after a few seconds to a minute. Let the pan cool as you finish making the dough. When you finish kneading the dough, the pan should be warm to the touch, but not hot. Plop the dough into the warm skillet, and it makes a perfectly warm spot for the dough to rise quickly!
Now, lets get down to the nitty-gritty:
How to Make Honey Whole Wheat Challah
Step 1: Proof the yeast.
Mix dry yeast with a pinch of sugar and warm water. Let it sit until the yeast foams up.
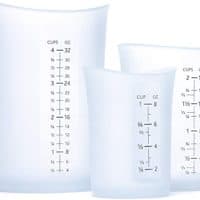
I love letting the yeast proof in a silicone measuring cup. You can measure the warm water into it and then proof the yeast right there.
Step 2: Make the dough.
While the yeast is proofing, mix whole wheat flour, salt, honey, oil, and eggs. Add the proofed yeast mixture, and mix the dough very well with a spoon or spatula.
Two things to note here:
- Make sure to mix the salt very well into the flour before adding any other ingredients. Salt can kill yeast, so you want it all incorporated into the flour and not able to touch the yeast. (Dead yeast = dough that won’t rise.)
- The dough will be too sticky to knead with your hands, so mix it well and semi-knead it with a spoon or spatula. If you add as much flour as you would to traditional challah dough, the final whole wheat challah will be very heavy. Add less flour, make a sticky dough, and you will end up with a lighter challah.

Step 3: Let the dough rise.
If you can, let the dough rise in a warm cast iron skillet. If you don’t have a skillet (which, really, what are you waiting for??), then you can turn your oven on high for a minute, switch it off, then put the dough into the warm oven.
Let the dough rise till doubled.

Step 4: Shape the challahs
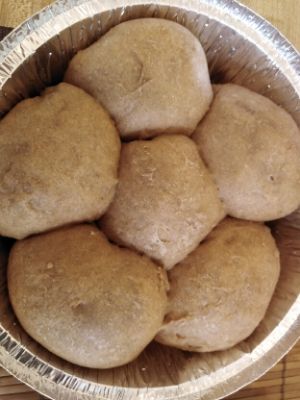
Traditional challah is braided. I’m usually too lazy to braid my challah, and just form small balls and place them into a round pan. The balls end up rising into each other, and you get a round challah that you can easily pull apart into small rolls or pieces.
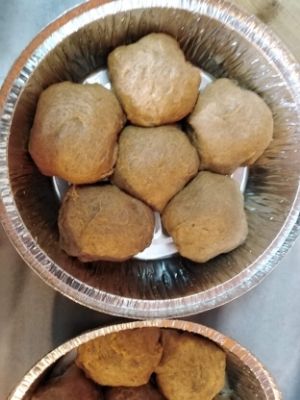
This dough recipe makes enough for me to make two round challahs like this.
If you want to learn how to braid challah, this video has some great techniques:
Step 5: Let the shaped challahs rise again
When I make white challah, I sometimes skip this second rising because I have no patience to wait. Don’t skip it here, though. You need to let the whole wheat challah rise as much as possible so they will be soft and fluffy.
Step 6: Bake the challah
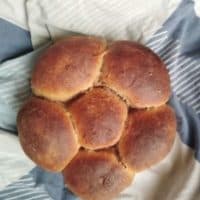
Bake the challah for 25-35 minutes, depending on the size of the challah, until they are a deep brown color and cooked through.

Step 7: Enjoy!
Some other recipes you might enjoy:
Skillet banana bread
Stuffed Chicken
Unstuffed Cabbage
Cinnamon Buns
Oatmeal Cookies
Honey Whole Wheat Challah
This small-batch honey whole wheat challah recipe yields 2 small whole wheat challahs that are so soft and fluffy, they taste like they are made with white flour! Even the most ardent whole wheat critics will be won over.
If you enjoy this recipe, please rate it five stars.
Ingredients
- 3/4 cup warm water
- 1 tbsp dry yeast
- pinch sugar
- 3.5 cups whole wheat flour (more if needed, but use sparingly)
- 1/2 tbsp salt
- 1/3 cup oil
- 1/3 cup honey
- 2 eggs
Instructions
- Put the warm water, yeast, and sugar in a small bowl or measuring cup. Set aside for a few minutes for yeast to proof (rise).
- Mix whole wheat flour and salt. Add oil, honey, and eggs, then add the proofed yeast mixture.
- Let the dough rise in a warm place until doubled (around 1 hour, depending on weather and temperature.)
- Shape challahs, and then let rise for another hour.
- Bake at 350F/180C until deep brown and cooked through, 25-40 mins, depending on size of challahs.
Notes
1. Mix the salt well into the flour before adding the yeast, because if salt directly touches the yeast, the yeast will die and your challahs won't rise.
2. Be very sparing with the amount of flour you use, as too much heavy whole wheat flour will yield heavy whole wheat challahs, and you want your challahs to be light and fluffy, not dense and heavy. (Unless for some odd reason you like dense, heavy challah, in which case, go crazy with that whole wheat flour.
3. Full disclosure: I've made this challah in round pans many times, and it came out great. The last two times I made it in the round pans, it came out browned on the top and raw in the middle. I'm not sure if it's because of the pans, my oven, or my cooking time. I made the challah again after that, and baked some in a traditional 3-string braid, and some in a cast iron pan, and they came out perfect. So if you want to be sure your challah won't be raw, then make them that way.
Recommended Products
As an Amazon Associate and member of other affiliate programs, I earn from qualifying purchases.
Nutrition Information:
Yield: 12 Serving Size: 1Amount Per Serving: Calories: 217Total Fat: 8gSaturated Fat: 1gTrans Fat: 0gUnsaturated Fat: 7gCholesterol: 31mgSodium: 305mgCarbohydrates: 33gFiber: 4gSugar: 8gProtein: 6g
Nutrition information was calculated by a third party.
Pin this recipe for later!


I’ve been looking for a good whole wheat challah recipe as I mill my own wheat and have had trouble getting it to be that classic challah texture. This one turned out perfect! I made one with cinnamon and raisins and it was delicious. Thank you!
I made this recipe for Rosh Hashanah, the Jewish New Year holiday. Traditionally we cook, bake, garnish with honey for a sweet year ahead . I added craisins, it came out fabulous! Thanks so much for this small batch recipe! ♡ from Israel
Can this be done in a bread machine? If so, in what order do ingredients go in?
This bread recipe is so lovely. The end result looks fantastic 🙂
This looks great I’d love to try some!
You make this look so easy! I just got my hands on dry yeast and will add this to my bread making list.
This looks amazing! I can’t wait to try it and I love your blogs name.
Aw, thanks!
This looks so yummy! I don’t know if I’d ever be able to make them look like that, but worth a shot! Thank you for sharing.
I have never heard of using your cast iron pan trick to getting bread dough to rise – I’ll need to try it (and this recipe)!. Looks really yummy – thanks!
Yes, the cast iron pan really does help the dough rise, you have to try it! Let me know how it works for you!
Oh this looks tasty